Over many years of shooting and teaching others, I’ve come to feel the first chorus lines of 38 Special’s s hit song are very instructional to handgun shooting. The song is said to be about relationships, but owing to the band’s name I believe the chorus also applies to handgun shooting – i.e. “Just hold on Loosely, but don’t let go. If you cling too tightly, you’re going to lose control”.
First, I’ll provide some context. I am fully aware the type of hold I teach students is different to most articles and videos on handgun shooting. I also understand it may be counterintuitive and surprising to new shooters (“Hold on loosely to handgun?! What?! Are you nuts?!”). I’ll therefore explain the manner and reasoning upfront and throughout. Also, I make no claims that what I advocate is something I’ve come up with solely on my own. It is the result of much analysis of various hold methods, observation of skilled shooters and years of instructing shooters on what works to consistently achieve tight and accurate shot groupings.
In addition, I want to stress that this manner of holding a handgun is focused on recreational and/or target shooting. In close-quarters defensive or combat shooting where there is risk of the firearm being taken from the shooter, one should certainly hold on as tightly as they feel is necessary.
As a foundation, let me quote the best advice I’ve ever had in shooting accurately. That is….” Most any gun can put five shots in the same hole. Your job as the shooter is to let it.” In other words, the shooter needs to avoid inputting any unnecessary forces that prevent the gun from being its most accurate.
If we think about the forces the gun exerts on the shooter when firing, it’s just two – i.e. Recoil straight back and Gravity straight down. The gun produces no forces right, left, forward or even up. There is admittedly ‘muzzle jump’ though. This is the result of the force of the gun’s recoil straight back not being in line with the force of the shooting hand countering the recoil. This is technically therefore a rotational torque rather than an upward force, which I’ll get into a bit later.
So, if we understand that the only forces during firing are recoil straight back and gravity straight down then those are the only forces the shooter needs to address. This means that any contact – force/pressure – on the sides of the gun need to be the same exact amount at the same exact time and at the same exact place on each side of the gun for the forces to balance. Looking at the structure of one’s hand and knowing the tension in our hands tends to vary in time and by finger, getting an exact left-right balance is nearly – if not completely – impossible.
To then avoid having our hands put non-balanced forces on the sides of the gun, we are largely left with two main options. One is to grip the gun just as tight as one can all the time so that when you pull the trigger your other fingers, thumbs and palms don’t vary in their pressures. This can lessen the variation in forces on the sides of the gun, but it’s exhausting and not very enjoyable. In addition, the strain of gripping so tightly causes trembling and quivering, neither of which helps with accuracy. The other, and I feel much better, option is to avoid varying side forces by not having any pressure on the sides of the grip or gun. Keeping the hold forces isolated to only the front and back of the grip (not sides) requires very little in the way of strength and requires no real ‘gripping’ of the gun.
Regarding the varying pressures, your fingertips of both hands are the greatest contributors to this. If you are truly gripping the gun by having pressure from any fingertips on the grip sides, when you pull the trigger there will be a variation in these pressures. Try extending your arm with the hand open and palm up. Now, try simulating squeezing a trigger fully back with your index finger. You’ll notice that you cannot curl your index finger without at least one of the other fingers or the thumb moving at least a bit. Your nerves and tendons are not fully independent in your arm, so when you pull the trigger finger back you typically have the other fingers moving as well. They may not move much, but they move enough to impact the hold on the gun and thereby accuracy and consistency.
Besides your fingers not moving mutually exclusively, your body also has some inherent tendencies in response to noise and recoil. If someone was to lightly flick your ear each time you shot, after three or four shots you’d be moving your head away as you pulled the trigger without even thinking about it. The same is true for your hands holding a gun. After each shot, your body wants harder and harder to counter that recoil impact. So, your fingers start gradually gripping tighter on the sides and the pressure pulses occur more strongly right at the point of trigger pull. This is known as anticipatory reflex, and it’s simply part of our body’s instincts.
I’ve watched thousands of people shoot and typically their first shot is the best, with each shot after that trailing off to the lower left for right-handed and lower right for left-handed. This is because the non-trigger fingers from the shooting hand tend to grip the gun tighter each shot – pulsing in on the grip side as the trigger is being squeezed. If you allow your non-trigger fingers to press the grip sides no harder than tapping your smart phone screen, you’ll be pulling the gun down low left (right-handed) or low right (left-handed) from two to four inches. I suspect most of you are nodding in recognition of this situation.
With the preceding in mind regarding why contact/pressure on the side of the grips or other parts of the gun are detrimental to accurate shots, I’ll now get into how to hold without doing so. Again, this is going to sound counterintuitive, but it works. That’s not just my opinion, but that of hundreds and hundreds of folks I’ve taught.

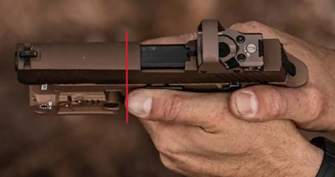
First, you want to hold the gun as high up on the grip as possible with the shooting hand – i.e. firmly up under the “beavertail” portion of the grip. Then place your trigger finger safely along the side of the frame portion above the trigger. Now, when you place your lower three fingers on the grip, place the front joint or even just the fingertips on the front of the grip. (See the below image for reference)
In holding this way, you’ll notice quickly that the shooting hand is barely touching the side of the grip. You’ll likely even be able to place one or two fingers up in between the space between the side grip panel and your shooting hand palm. So instead of ‘gripping’ like a hammer or pipe wrench you’ll be ‘holding’ between your fingertips and the base of your palm.
As an analogy, think crab versus monkey. Millions of years of primate evolution have us grabbing anything cylindrical using our whole hand, wrapping our fingers all around, and gripping tightly. This works for hammers, wrenches, axes, and frying pans…. but not handguns. Instead, think of holding out a tiny kitten or an egg. If that doesn’t work for you, then think of holding out a cactus. 😊
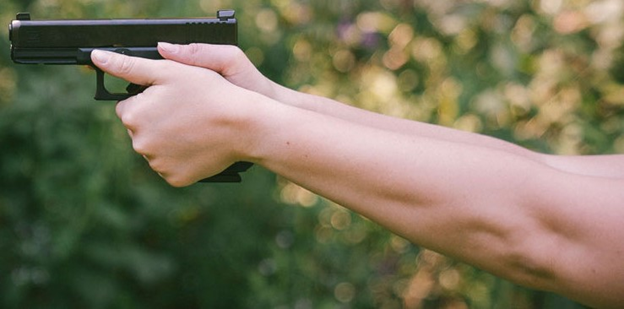
Once you’re holding the gun lightly with your shooting hand you can position your non-shooting hand. Do this by placing the index finger of your non-shooting hand directly under and against the bottom of the trigger guard. The non-shooting hand should be wrapped around the shooting hand so that the thumb of the non-shooting hand is across from your extended trigger finger. (see below image for reference)
Since your non-shooting hand has four fingers under the trigger guard and the shooting hand only three, the shooting hand is a bit higher. This means the end of your shooting hand thumb should be resting on top of the base of the non-shooting thumb. Then, both thumbs should point at the target but just off the side of the gun.
Why off the gun you might ask? Well, the slide moves back quickly and often has serrations on the side that can hurt if raked across your thumbs. Also, the slide needs to move back and forth unimpeded. Having your thumbs touching the slide adds friction which causes the slide to not operate fully. Lastly, and this is critical for accuracy, you don’t have thumbs on the other side of the gun pushing back. So, if your thumbs happen to slightly push on the gun while squeezing the trigger, you’ll be moving the gun to the side.
To set up firing the gun, you place the gun out straight in front of you with arms fully extended. The arm of the shooting hand then become the structure for opposing the recoil force. The non-shooting hand then pulls back using the bases of the non-shooting hand fingers (proximal phalanges) into the lower palm of the shooting hand. This enables bringing the muzzle back down after the previously noted torque (“muzzle jump”). Again, the only pressure should be on the front and back of the grip. This allows you to hold securely without ‘gripping’ tightly.
In the above picture, take note that the arms are straight but not locked and rigid. Also note the position of the thumbs and that the hands and arms are relaxed – i.e. no veins or tendons popping out from having a ‘death grip’ and locked elbows.
Again, you want to ‘hold’ the gun securely but not ‘grip’ the gun like an ax handle.
Now that you better understand how to ‘hold’ a pistol to shoot accurately, we’ll address other fundamentals in another article.
Instructor Jeff Pharris
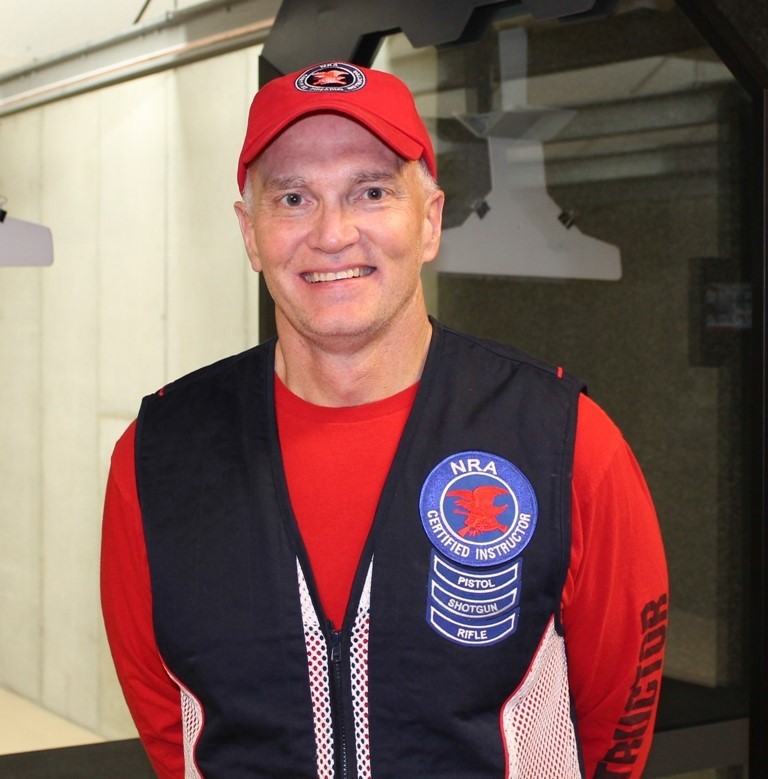
ABOUT THE AUTHOR
Jeff Pharris brings nearly 50 years of pistol, rifle and shotgun shooting experience to The Range of Richfield. Growing up in rural Nebraska within a family of hunters he enjoyed duck, dove, pheasant, goose, quail and varmint hunting from a young age. He takes an involved and friendly approach to helping people get involved with shooting and becoming accurate shooters.


